
| 일 | 월 | 화 | 수 | 목 | 금 | 토 |
|---|---|---|---|---|---|---|
| 1 | 2 | 3 | 4 | 5 | 6 | |
| 7 | 8 | 9 | 10 | 11 | 12 | 13 |
| 14 | 15 | 16 | 17 | 18 | 19 | 20 |
| 21 | 22 | 23 | 24 | 25 | 26 | 27 |
| 28 | 29 | 30 |
- 자바스크립트
- 리트코드
- 개발일기
- 날씨 웹 만들기
- 삼항연산자
- 간단한 날씨 웹 만들기
- 개발공부
- JavaScript
- [파이썬 실습] 심화 문제
- 자바스크립트 split()
- 코드스테이츠
- 자바스크립트 sort()
- 프론트개발공부
- leetcode
- 부트캠프
- HTML
- RN 프로젝트
- [파이썬 실습] 기초 문제
- 엘리스 ai 트랙
- [AI 5기] 연습 문제집
- 엘리스 AI 트랙 5기
- 자바스크립트 날씨
- [파이썬 실습] 중급 문제
- reactnativecli
- 엘리스
- 자바스크립트 reduce()
- 프론트개발
- 코딩부트캠프
- 자바스크립트 날씨 웹 만들기
- 프로그래머스
- Today
- Total
개발조각
[모두의 이력서_5일차] Bcrypt로 비밀번호 암호화 하기 본문
처음으로 혼자서 프론트부터 백까지 하는 프로젝트이다 보니 정확하지 않을 수 있습니다!
Bcrypt로 비밀번호 암호화 하기
현재 DB에 저장된 비밀번호 보면 너무 안전하지 않습니다.
몽고디비 컴패스를 보면 비밀번호가 그대로 나와 있다는 것을 알 수 있습니다.

그래서 Bcrypt를 이용해서 비밀번호를 암호화해줘서 데이터베이스에 저장해줘야 합니다.
1. Bcrypt 설치하기
npm install bcrypt --save

npm install -D @types/bcrypt // 타입스크립트 사용하는 경우
2. Bcrypt로 비밀번호 암호화 하는 순서
https://www.npmjs.com/package/bcrypt?activeTab=readme
bcryptjs
Optimized bcrypt in plain JavaScript with zero dependencies. Compatible to 'bcrypt'.. Latest version: 2.4.3, last published: 6 years ago. Start using bcryptjs in your project by running `npm i bcryptjs`. There are 3002 other projects in the npm registry us
www.npmjs.com
유저 정보들 (Account, Password 등등)을 데이터 베이스에 저장하기 전이 암호화 할 타이밍
// server.ts
// 회원가입 라우터
app.post("/register", async (req, res) => {
  const user = new User(req.body);

// save하기전에 암호화를 해줘야 된다.
  const result = await user
    .save()
    .then(() => {
      res.status(200).json({
        success: true,
      });
    })
    .catch((err: "empty") => {
      res.json({ success: false, err });
    });

  return result;
});
1. 기본틀 작성
// User.ts
const bcrypt = require('bcrypt');

.
.
.

// pre는 몽그스 메소드
// save를 해주면 유저 정보를 저장하기 전에(server.ts save전) 무언가를 한다는 것이다.
serSchema.pre("save", function (next) {
	// 할꺼 다하고 끝나면
    next(); // server.ts의 save로 보낸다.
});
2. soltRounds = 10;
saltRounds : salt가 몇 글자인지 나타낸다.
// User.ts
const bcrypt = require('bcrypt');
const saltRounds = 10;

.
.
.

serSchema.pre("save", function (next) {
	bcrypt.genSalt(saltRpunds, function(errm salt){ // salt 만들기
    })
    next();
});
3. salt를 먼저 생성
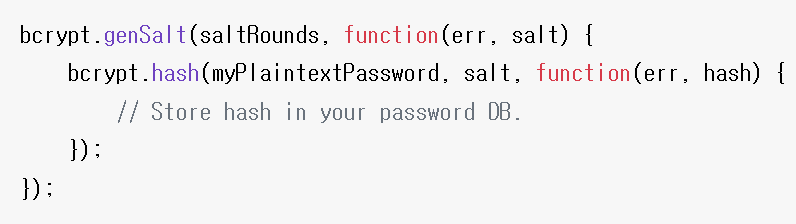
여기서 myPlaintextPassword는 암호화된 password가 아닌 순수하게 작성한 password를 가리킵니다.
그러므로 userSchema의 password를 가져오면 됩니다.
// User.ts
const bcrypt = require('bcrypt');
const saltRounds = 10;

const userSchema = new Schema({
.
.
.
})

serSchema.pre("save", function (next) {
	const user = this; // userSchema를 가리킴

	bcrypt.genSalt(saltRpunds, function(err, salt){
    	if(err) return next(err)

        // salt를 제대로 생성했다면
        // user.password라고 하면 userSchema의 password로 넣은 값
        bcrypt.hash(user.password, salt, function (err, hash){ // hash는 암호화된 비밀번호
        }
    })
    next();
});
user.password라고 하면 userSchema의 password로 넣은 값을 가져올 수 있습니다.
password: 1234로 넣었으면 1234를 가지고 옵니다.
4. salt를 이용해서 비밀번호 암호화 하기
// User.ts
const bcrypt = require('bcrypt');
const saltRounds = 10;

const userSchema = new Schema({
.
.
.
})

serSchema.pre("save", function (next) {
	const user = this;

	bcrypt.genSalt(saltRpunds, function(err, salt){
    	if(err) return next(err)

        bcrypt.hash(user.password, salt, function (err, hash){
        	// 에러 발생할 경우 server.ts에 있는 save로 보내기
            if (err) return next(err);

            // 암호화된 비밀번호를 만드는데 성공했으면 유저의 순수비밀번호를 암호화한 비밀번호로 교체
            user.password = hash;
            next();
        }
    })
    next();
});
3. 비밀번호 변환될 때만 bcrypt 발동
사이트를 이용하다 보면 비밀번호를 변경할 때도 있고, 사용자 이름, 이메일을 변경하는 경우가 생깁니다.
무언가 변경해서 새로 저장할 때마다 bcrypt부분이 계속 변경하게 됩니다.
즉 비밀번호가 아니라 이메일만 바꿀 때에도 다시 비밀번호를 암호화해버립니다.
그러므로 조건을 걸어줘야 됩니다.
// User.ts
const bcrypt = require('bcrypt');
const saltRounds = 10;

const userSchema = new Schema({
.
.
.
})

userSchema.pre("save", function (next) {
  const user = this;

// 비밀번호를 변환될때만 bcrypt발동
  if (user.isModified("password")) {
    // 비밀번호를 암호화 시킨다.
    bcrypt.genSalt(saltRounds, function (err, salt) {
      if (err) return next(err);

      if (!user.password) return null;
      bcrypt.hash(user.password, salt, function (err, hash) {
        if (err) return next(err);
        user.password = hash;
        next();
      });
    });
  }
});

export const User = model("User", userSchema);
4. 비밀번호 말고 다른걸 바꾸는 경우 next()해주기
// User.ts
const bcrypt = require('bcrypt');
const saltRounds = 10;

const userSchema = new Schema({
.
.
.
})

userSchema.pre("save", function (next) {
  const user = this;

// 비밀번호를 변환될때만 bcrypt발동
  if (user.isModified("password")) {
    // 비밀번호를 암호화 시킨다.
    bcrypt.genSalt(saltRounds, function (err, salt) {
      if (err) return next(err);

      if (!user.password) return null;
      bcrypt.hash(user.password, salt, function (err, hash) {
        if (err) return next(err);
        user.password = hash;
        next();
      });
    });
  } else { // 비밀번호를 바꾸는게 아니라면 즉 다른거를 바꾸라면 -> 만약 없으면 계속 userSchema에 머무르게 된다.
    next(); // server.ts save로 보내기
  }
});

export const User = model("User", userSchema);
npm run start포스트맨에 보내고 몽고디비컴패스에 확인하면

암호화가 잘되었다. 끝-!
require → import
User.ts

import { Schema, model, Model } from "mongoose";
import bcrypt from "bcrypt";

const saltRounds = 10;

const userSchema = new Schema({
  name: {
    type: String,
    maxlength: 50,
  },
  email: {
    type: String,
    trim: true,
    unique: 1,
  },
  password: {
    type: String,
    minlength: 5,
  },
  lastname: {
    type: String,
    maxlength: 50,
  },
  role: {
    type: Number,
    default: 0,
  },
  image: String,
  token: {
    type: String,
  },
  tokenExp: {
    type: Number,
  },
});

userSchema.pre("save", function (next) {
  const user = this;

  // 비밀번호를 변환될때만 bcrypt발동
  if (user.isModified("password")) {
    // 비밀번호를 암호화 시킨다.
    bcrypt.genSalt(saltRounds, function (err, salt) {
      if (err) return next(err);

      if (!user.password) return null;
      bcrypt.hash(user.password, salt, function (err, hash) {
        if (err) return next(err);
        user.password = hash;
        next();
      });
    });
  }
});

export const User = model("User", userSchema);
참고자료
https://www.youtube.com/watch?v=XonyJxSDoGE
'모두의 이력서' 카테고리의 다른 글
| [모두의 이력서_6일차] Auth 기능 및 로그아웃 기능 (0) | 2023.03.30 |
|---|---|
| [모두의 이력서_5일차] 로그인 기능 Bcrypt, jsonwebtoken (0) | 2023.03.29 |
| [모두의 이력서_4일차] NODE MON 설치, MONGO URI 정보를 보호하기 (0) | 2023.03.28 |
| [모두의 이력서_4일차] 회원가입 기능 만들기 (몽고디비에서) (0) | 2023.03.28 |
| [모두의 이력서_4일차] 몽고디비 Model Schema 작성하기 (0) | 2023.03.28 |


