
Notice
Recent Posts
Recent Comments
Link
| 일 | 월 | 화 | 수 | 목 | 금 | 토 |
|---|---|---|---|---|---|---|
| 1 | 2 | 3 | 4 | |||
| 5 | 6 | 7 | 8 | 9 | 10 | 11 |
| 12 | 13 | 14 | 15 | 16 | 17 | 18 |
| 19 | 20 | 21 | 22 | 23 | 24 | 25 |
| 26 | 27 | 28 | 29 | 30 |
Tags
- 자바스크립트
- 엘리스 AI 트랙 5기
- 코드스테이츠
- 날씨 웹 만들기
- [파이썬 실습] 기초 문제
- leetcode
- 자바스크립트 날씨 웹 만들기
- HTML
- 자바스크립트 sort()
- 프론트개발
- 자바스크립트 날씨
- 자바스크립트 split()
- 엘리스
- 코딩부트캠프
- 삼항연산자
- 프론트개발공부
- [AI 5기] 연습 문제집
- [파이썬 실습] 심화 문제
- 개발공부
- 간단한 날씨 웹 만들기
- [파이썬 실습] 중급 문제
- 부트캠프
- 개발일기
- RN 프로젝트
- 자바스크립트 reduce()
- 엘리스 ai 트랙
- JavaScript
- 프로그래머스
- 리트코드
- reactnativecli
Archives
- Today
- Total
개발조각
[React-native CLI] RN에서 react-native-calendars 사용하기 본문
React-Native/[프로젝트] 택시 운행관리 기록장
[React-native CLI] RN에서 react-native-calendars 사용하기
개발조각 2024. 3. 18. 13:47728x90
반응형
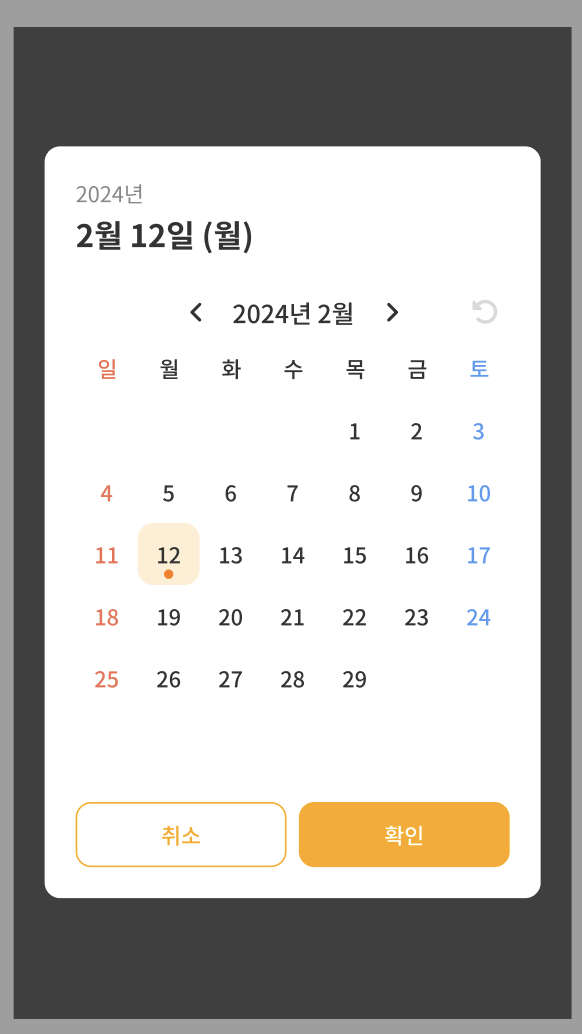
이러한 화면을 구현하기 위해 react-native-calendars 라이브러리를 사용하게 되었습니다.
일단은 react-native-calendars를 사용했는데, 생각보다 제약이 많아서 나중에 직접 만들어볼까 합니다.
(날짜 원래 위치로 되돌리기가 안돼서 계속 쓰긴 힘들 것 같아요.)
설치
npm i react-native-calendars
사용방법
import {Calendar} from 'react-native-calendars';

const CalendarView = () => {
	return(
    	<Calendar />
    )
}

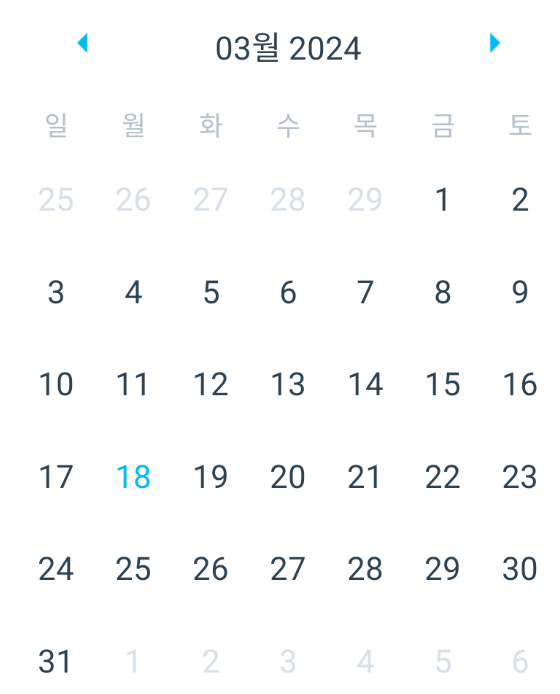
달력 영문을 한글로 수정하기
LocaleConfig를 이용해서 영문을 한글로 수정할 수 있습니다.
이를 통해 "1월~12월", "일~토"로 교체할 수 있습니다.
import {Calendar, LocaleConfig} from 'react-native-calendars';

LocaleConfig.locales['ko'] = {
  monthNames: [
    '01월',
    '02월',
    '03월',
    '04월',
    '05월',
    '06월',
    '07월',
    '08월',
    '09월',
    '10월',
    '11월',
    '12월',
  ],
  monthNamesShort: [
    '1월',
    '2월',
    '3월',
    '4월',
    '5월',
    '6월',
    '7월',
    '8월',
    '9월',
    '10월',
    '11월',
    '12월',
  ],
  dayNames: [
    '일요일',
    '월요일',
    '화요일',
    '수요일',
    '목요일',
    '금요일',
    '토요일',
  ],
  dayNamesShort: ['일', '월', '화', '수', '목', '금', '토'],
  today: '오늘',
};
LocaleConfig.defaultLocale = 'ko';

const CalendarView = () => {
	return(
    	<Calendar />
    )
}
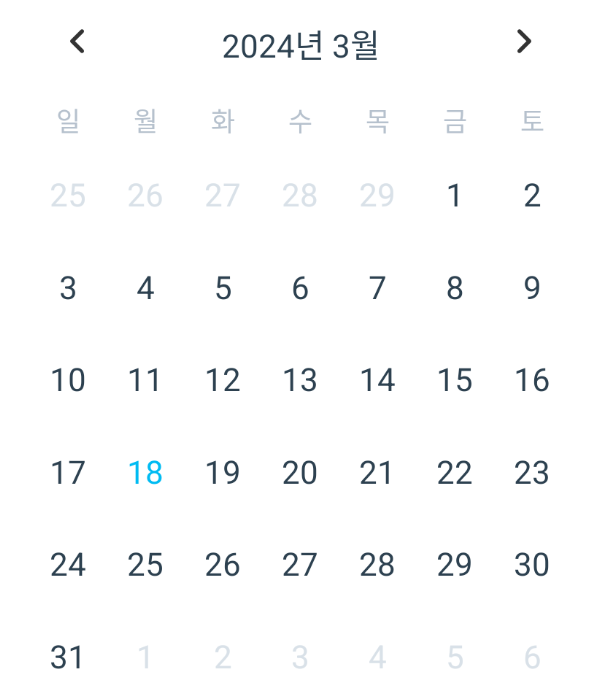
달력 타이틀을 "2024년 3월"로 변경
monthFormat을 이용하여 변경하실 수 있습니다.
import {Calendar, LocaleConfig} from 'react-native-calendars';

LocaleConfig.locales['ko'] = {...}
LocaleConfig.defaultLocale = 'ko';

const CalendarView = () => {
	return(
    	<Calendar monthFormat={'yyyy년 M월'} />
    )
}
이전달, 다음 달 버튼 svg로 변경
renderArrow를 통해 변경할 수 있습니다.
import {Calendar, LocaleConfig} from 'react-native-calendars';
import {SvgXml} from 'react-native-svg';

import {svg} from '../../assets/svg';

LocaleConfig.locales['ko'] = {...}
LocaleConfig.defaultLocale = 'ko';

const CalendarView = () => {
	return(
    	<Calendar
        monthFormat={'yyyy년 M월'}
        renderArrow={direction =>
          direction === 'left' ? (
            <SvgXml xml={svg.prev} />
          ) : (
            <SvgXml xml={svg.next} />
          )
        }
      />
    )
}
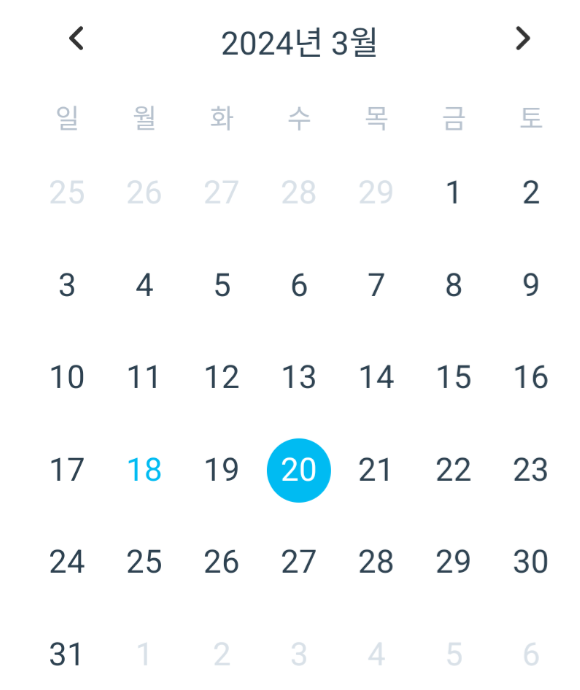
날짜 선택하기
onDayPress를 이용하여 날짜를 선택하실 수 있습니다.
import {Calendar, LocaleConfig} from 'react-native-calendars';
import {SvgXml} from 'react-native-svg';

import {svg} from '../../assets/svg';

LocaleConfig.locales['ko'] = {...}
LocaleConfig.defaultLocale = 'ko';

const CalendarView = ({checkDate, setCheckDate}) => {
  // {"dateString": "2024-03-18", "day": 18, "month": 3, "timestamp": 1710720000000, "year": 2024}
  const onDayPress = (day: {dateString: SetStateAction<string>}) => {
    setCheckDate(day.dateString);
  };

	return(
    	<Calendar
          markedDates={{
          [checkDate]: {
            selected: true,
          },
        }}
          monthFormat={'yyyy년 M월'}
          renderArrow={direction =>
          direction === 'left' ? (
            <SvgXml xml={svg.prev} />
          ) : (
            <SvgXml xml={svg.next} />
          )
        }
      />
    )
}
저는 선택할 state를 props으로 받아와서 작성해 주었습니다.
마크 적용하기
import {Calendar, LocaleConfig} from 'react-native-calendars';
import {SvgXml} from 'react-native-svg';

import {svg} from '../../assets/svg';

LocaleConfig.locales['ko'] = {...}
LocaleConfig.defaultLocale = 'ko';

const CalendarView = ({checkDate, setCheckDate}) => {
  const markedDates: Record<string, {marked: true}> = {
    '2024-03-06': {marked: true},
    '2024-03-07': {marked: true},
    '2024-03-08': {marked: true},
  };

  const markedSelectedDates = {
    ...markedDates,
    [checkDate]: {
      selected: true,
    },
  };

  // {"dateString": "2024-03-18", "day": 18, "month": 3, "timestamp": 1710720000000, "year": 2024}
  const onDayPress = (day: {dateString: SetStateAction<string>}) => {
    setCheckDate(day.dateString);
  };

	return(
    	<Calendar
          markedDates={markedSelectedDates}
          monthFormat={'yyyy년 M월'}
          renderArrow={direction =>
          direction === 'left' ? (
            <SvgXml xml={svg.prev} />
          ) : (
            <SvgXml xml={svg.next} />
          )
        }
      />
    )
}
onDayPress에서 day를 확인하면 아래와 같은 값이 나옵니다.
{"dateString": "2024-03-18", "day": 18, "month": 3, "timestamp": 1710720000000, "year": 2024}
더 다양한 커스텀은 추후에 추가적으로 작성하겠습니다.
728x90
반응형
'React-Native > [프로젝트] 택시 운행관리 기록장' 카테고리의 다른 글
| [React-native CLI] RN 기록화면 구현하기 2부(useReducer 사용하기) (0) | 2024.03.18 |
|---|---|
| [React-native CLI] RN 기록화면 구현하기 1부 (선택한 날짜에 따라 Creact, Update하기) (0) | 2024.03.18 |
| [React-native CLI] RN에서 useCallback 사용 (useEffect 의존성 배열 오류 발생 해결) (0) | 2024.03.15 |
| [React-native CLI] Modal 구현하기, 모달 커스텀 (0) | 2024.03.14 |
| [React-native CLI] day.js를 이용한 달력 이동 (0) | 2024.03.14 |
'React-Native/[프로젝트] 택시 운행관리 기록장' Related Articles
more


Comments